DIY PPF Installation: Your Ultimate Guide to Applying Paint Protection Film
In the modern world of automobiles, people who own or drive a car, worry a lot about the way their car looks. Paint Protection Film (PPF) has become quite a common feature for protection against scratches, chips and foreign agents. In this guide DIY PPF install is described comprehensively so that you are well versed and ready to apply this shielding film onto your vehicle. We will explain how to choose a type of film and how to install it step by step including how to avoid common mistakes, so you will get the effect of hiring an expert for an installation but without the honors. This article will benefit many, from the first PPF installation attempts to enthusiasts with the solid background on how to do PPF wraps and others for the improving look of a pass cars.
What is PPF and Why Should You Choose It?

Understanding Paint Protection Film (PPF)
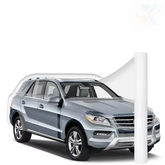
Paint Protection Film (PPF) is a type of clear, tough polyurethane film meant for application on the vehicle’s paintwork to provide protection. It is scratch resistant, chip resistant, and UV resistant thus, it aids in maintaining the appearance of the vehicle. The film is adhered to the painted area of the vehicle and can be contour cut to fit different parts of the vehicle, thereby improving appearance while serving a purpose. The application of PPF is most beneficial in areas prone to high impact such as hoods, bumpers, and fenders protecting some of the most exposed parts of the vehicle from damage and degradation.
Benefits of Using PPF for Your Car’s Paint
Paint Protection Film (PPF) has a lot in helping preserve in good condition the surface of one’s car. The first benefit is that PPF is an effective shield against impact. Instead, it is able to soak up the hit as soon as any piece of debris sent on the road tries to leave a scratch or a chip on the body paint. To add more, the film acts as a shield against UV radiations that interact with the vehicle and facilitate oxidation and fading of the paint especially in heavy sunlight. This maintains the integrity of the paint protection throughout its lifespan. In addition, PPF is hydrophobic. This is considered an advantage as cleaning and maintenance are eased as water and other debris easily run off. PPF is also invisible; thus it does not alter the look of the paint but rather serves as an additional layer over its surface, which is what most car owners want when they want more strength without changing the appearance of the vehicle.
Comparing PPF to Other Protection Films
There are many parameters to juxtapose with Paint Protection Film (PPF) in any dimensional inclinations that a person is trying to strike these differences with other protection alternatives like; ceramic coatings or vinyl wraps, these includes, tensile strength, ease of application and surface protection. Though PPF is the only material engineered to perform in that its purpose is to take the shock such as organic dirt and foreign metal particles, hence they have better scratch and chip resistance compared to Ceramics, which are more likely to resist radiation or chemicals but do not resist physical forces at all.
Vinyl wraps, on the other hand, support pleasant look and serve protective roles on the films, enabling design changes that are pronounced. However, this does not avail enough protection from impact as PPF does; they may afford some protection from small scratches, but are of little value against heavy object impacts. More durable, PPF stays clear over the years while more susceptible, vinyl wraps lose their desired look and color which makes them effective. In the long run, the decision of the use of such a suitability or the other one, lies with the owner of the property in question and what aspects are most important to them, whether politically correct maximum safety with PPF or minimum (or no) safety and fancy forms with vinyl wraps.
How to Choose the Right PPF for Your Car

Factors to Consider When Choosing the Right PPF
- Thickness: Choose sufficient thickness PPFs which range from 6 to 8 mils for protection against damages as they genuinely offer protection to the customers.
- Self Healing Properties: Choose PPFs which are self-healing and can restore themselves after being slightly damaged by heat, even though minor scratches are often ugly and annoying.
- Clarity: Look for a clear film to protect the paint and finish of the car without altering its colour.
- UV Resistance: Be sure that the PPF is good enough to withstand strong sunlight so that the coating does not get yellow or degrade over a period of time.
- Warranty: Seek to understand the warranty from the manufacturer because it is an indication of how long or how reliable the branding product will be.
- Installation: Go for the film which will go over the surfaces of your car and which professionally install irrespective of the presence of bubbles and any relatives imperfections.
- Price: Take into account the value for money and numerous features for which even less money protection is provided but meets your requirement.
Top Brands for PPF: Xpel, 3M, and Stek
- Xpel: Another brand famous for the high quality of their PPF products is Xpel. They have a large selection of PPF products almost every one of which is long-lasting and self-healing. The brand emphasizes on optical characteristics and offers a large variety of warranties increasing consumers’ trust in their products.
- 3M: For many decades now, our company has established itself as one of the leaders in the film industry, which is why the company also offers PPF protection systems which serve as a shield against the weather and other external conditions. Their films use the best technology for applying and removing them, and they provide good protection and transparency.
- Stek: This brand is becoming a true hit in the market because its new products such as Stek Dynoshield, are also gaining attention because of the self-healing technology and high level of gloss. These films are designed to provide high levels of UV protection and excellent durability, making the brand competitive in the market.
Pre-Cut vs. Custom PPF Kits
Considering the fact that there are pre-cut and custom PPF kits, one must examine to define one or another particularly for the appropriate selection.
Pre-Cut Kits: These are factory manufactured to the shapes and size of the vehicle hence can be fitted on them easily and within a short time, which is a huge time saver when it comes to the installation process. They are usually faster to apply with little or no help from professionals as they have standard measurements that do away with too much cutting. Nevertheless, such kits may not be satisfactory to vehicle owners where only common vehicle makes are offered.
Custom Kits: However, in Custom PPF kits, industrial designers get hired to ensure that the shape of the PPF perfectly suits the vehicle’s shape thus providing PPF coverage. This option is very much ideal for those wanting to cover up a pretty part of the car such as the areas near the rear mirrors or any other difficult shape. On the con, however, custom kits will take a long time to install and may require more money due to the nature of the product. In conclusion, it all comes down to personal choices in regard to the relevance of pre-cut and custom precision kits in terms of ease of application, security, and affordability.
Preparing for DIY PPF Installation

Essential Tools and Materials Needed
To achieve a positive results on every installation of DIY PPF there are tools and materials that must be provided:
- Squeegee: Used for rubbing the film and for air displacement.
- Heat Gun: For pushing the film into the forms of the vehicle and for aiding contraction.
- Precision Knife or Blade: For cutting away additional material and for getting sharp edges.
- Application Solution: This comprises water and soap, and it helps in positioning the film.
- Microfiber Cloths: To clean the surfaces and also dry the film as one applies it.
- Measuring Tape: To take measurements of required areas of the vehicle.
- Ruler or Straight Edge: For directing cut of the film straight and leveled.
By having these tools and materials, people will be ready for a productive and satisfactory PPF installation.
How to Use a Clay Bar for Surface Preparation
The use of a clay bar has been established as a necessary process when prepping the surface of the vehicle for the installation of PPF. Steps should be followed for best results:
- Clean the Car: The first thing to do is to wash the vehicle completely to get rid of any dirt or grime, grease and other contaminants. Allow the surface to be dry before moving on to other steps.
- Break Off a Piece of Clay: Take the clay bar and remove a portion the way you would a golf ball sized piece and stretch it in your hands to facilitate kneading.
- Moistened the Surface: Use a clay lubricant or a combination of water and soap to spray on a small area of the vehicle. This will discourage the clay from sticking on and scratching the paint.
- Scrub the Surface with the Clay Bar: Place a clay bar on the dried portion and cover it with leather; move the port back and forth covering the area with clay till its smoothness starts increasing.
- Clean the Surface: Wipe the pencil-drawn area over which you had worked with the clay and over the pliant area with a waste cloth of microfibers to remove traces of clay settled on this bygone area.
- Do it again: Move forward with treatment of other desired surfaces till all the clay surfaces are treated with clay bar and no treated surface has been missed out. Continue to Closely mold the clay after every few wipes to reveal new portions of plaster that have not yet been contaminated.
- Final Clean-Up: After using the clay bar, conduct a final wash on vehicle to get rid of the remaining lubricants before putting on the PPF.
The application of a clay bar works on removing sub-surface impurities thus provision of a clean surface mildlyy enhances the adhesion of the PPF.
The Importance of Paint Correction Before Applying PPF
Paint correction is one of the most important steps because the clear coat of the automobile needs to be stripped from the uneven surface to give a smooth surface for Paint Protection Film (PPF). Below are some main reasons why this should be done:
- Bonding is improved: PPF with good adhesion is related to the availability of smooth, well-corrected paint surface. Such a bond avoids the problems of gas or water vapor scalding under the protective layer and eventually causing lifting and peeling.
- Aesthetic improvement: The surface of the vehicle will look good, and thus the application of PPF will be good enough to make sure it looks good on the finish of the vehicle instead of being a disturbance.
- Risk of internal destruction is mitigated: Once the paint is corrected and the PPF is installed, the chances of undesirable elements and destruction interspersed with the film are minimized. This step also extends the durability of the paint and that which is given by the film.
In conclusion, paint correction is necessary for the successful application of PPF ensuring maximum adhesion, visual décor and protection of vehicle surface for the intended duration.
Step-by-Step Guide to Installing PPF

Applying PPF to the Front Bumper
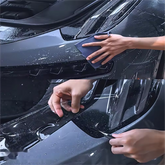
When working with PPF on the front bumper, a host of considerations ought to be taken into account for successful installation.
- Surface Preparation: Such that the surfaces are available for bonding purposes, thoroughly clean the bumper and ensure that there are no contaminants in the form of debris, wax, or grease residues.
- Measure and Cut: Identify the dimensions of the bumper precisely, and after which cut, the PPF would be made to measure with enough area on existing surfaces cut out.
- Use a Slip Solution: Water and detergent in a 3:1 ratio can be measured and applied on the adhesive side of the film so as to allow for shuttle which allows movement of the film during placement.
- Positioning: Position the film over the bumper making sure that correct placement is observed and that no air pockets or creases are present whilst the film is being adhered to.
- Squeegee Application: Starting at the center and moving towards the sides, take a soft squeegee and eliminate excess solution from the piece and any air pockets.
- Trimming: After fixing the film properly on the intended surface, any extra material that comes with the film is trimmed to match the edge of the bumper.
- Curing: For proper adhesion and durability, cure the film in accordance with the manufacturer's requirements, which in most cases are warm and dry.
To achieve a desirable outcome, it is crucial that these procedures are followed allowing for an accurate, professional PPF installation on the front bumper.
PPF Installation on Headlights and Fenders
For the optimal installation of PPF on the headlights, fenders, and any other surface, the following measures should be taken:
- Surface Assessment: Look at the surface of the headlights and the fenders and any scratches or other flaws which are going to affect the adhesion. Refinish such areas if needed.
- Cleaning: Scrub the surfaces with isopropyl alcohol or some other cleaning and degreasing solution in order to remove all contaminants which can interfere with bonding.
- Measurement And Cutting: Take the dimensions of the headlights and the fenders into consideration and make the measurements appropriately. The PPF is cut to fit but it is good practice to leave some allowance of overlapping edges.
- PreApplication Slip Solution: A slip solution is spread on the adhesive side of the PPF in order to help in placement of the film.
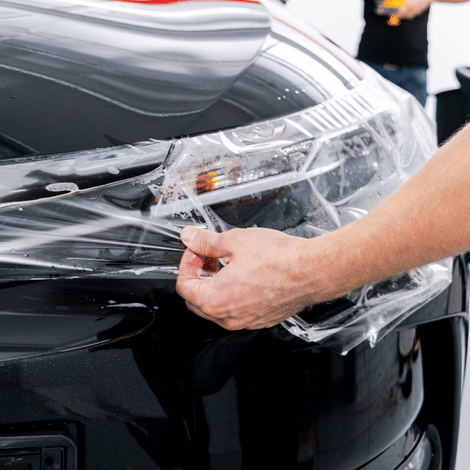
- Application: Position the PPF where it is required. Use a soft squeegee to eliminate all air pockets and wrinkles and to make sure that the film conforms tightly to the contours of the headlights and fenders.
- Trimming and finishing: When the film is properly situated, cut away the rest of the film on the sides and corners for a clean finish.
- Curing process: The curing procedure specified by the manufacturer should be adhered to while applying the film, and once the film is applied, it should be placed in a room for optimum adhesion and durability.
Following these explicit instructions enables the application of PPF on headlights and fenders to be done accurately, ensuring that its damaging capacity and aesthetic value are preserved.
Tips and Tricks for Tackling DIY PPF Projects
- Use Heat Sensibly: During application of the PPF, the use of low heat helps to make the film soft enough to be stretched and bent so that the application of the film around edges and curves can be made uniform. A heat gun or hair dryer can work just right but caution should be taken to regulate the heat not to damage the film.
- Work in Clean Rooms: Since the installation process will be done by additional members in the panel, it would be most beneficial for this task to be executed in an environment devoid of dust, moderate temperature and humidity. This reduces the chances of dirt settling down on the film and facilitates better adhesion and curing.
- Have time: Avoid haste in the course of the film application in the intended areas. They may misplace a film or entrap some air bubbles in the process. Such mistakes usually look bad at the very end, and therefore, it is wise to avoid them by taking time. Work preserving calmness and methodical pace but taking care to re-appear at the film and its position frequently and only stick it down after all is well.
With these tips in your mind, that will make the work easier and the end results more satisfactory, particularly for those who wish to try and undertake PPF projects on their own.
Common DIY PPF Installation Mistakes and How to Avoid Them

Dealing with Air Bubbles and Creases
A soft squeegee will be useful for gently pushing the air outwards towards the edges of the film however care must be taken in the process as excess air may inflate pockets underneath the surface causing air pockets. It is advisable to first apply the squeegee onto the vinyl and moving in circles as one moves outwards, pressure being applied, for better results. There are areas where intervening can be caused by air trapped underneath the film, in which case the air was creased and was forced underneath the encased material, a small pin can be introduced.
On the other hand, in the case there are some creases, take cognizance of their extent first. Most of the minor creases can be eliminated using a squeegee and heat application. More serious creases specialist will reach for the film whilst it is still warm and detach it from the surface. There is need for patience and concentration in order to get good results.
Using a Heat Gun or Hair Dryer Effectively
In any attempts at DIY installations of PPF, the heat gun or hair dryer should be used carefully and evenly across to avoid scorching the film. The device should be no closer than 6 to 12 inches from the surface and moved back and forth so that heat is spread uniformly. This makes the film soften and can be shaped to the desired position without an effort. However, avoid overheating any area as this may lead to bubbling or clumping of the film structure. Also, the heat source should be applied after the film is fitted in position, in order to heat up the glue which enhances its binding to the surface and also allows any air pocket trapped underneath to be released to the surface. Protective gloves need to be worn to avoid burns, and the work area should be adequately ventilated to avoid inhalation of fumes.
Ensuring Proper Adhesion of PPF
Before Paint Protection Film (PPF) can be efficiently adhered onto the surface, a number of measures must be put into consideration. The very first requirement is that the surface which is going to be covered by the films be properly prepared with appropriate automotive soap, getting rid of all forms of impurities such as soil, wax and grease. This can be further enjoined by ordinary hand washing soap.
The second main step is to control the mounting environment; the optimal temperatures for installation which enhance the strength of the adhesion are usually within the range of 60 °F to 80 °F (15 °C to 27 °C). It is also advisable to post wash the car for at least 24 hours before installing the PPF to allow the surface to dry adequately.
The right mounting procedures should also be observed. This entails ensuring that the film is positioned in the correct orientation before touch down and uniform pressure should be exerted when installing the film to achieve a uniform adhesion. After installing, it is advisable to let the film cure in a place that is stable and out of influence from sunlight which may aggravate the bonding process and the longevity of the PPF.
Maintaining Your PPF and Long-Term Care

Regular Cleaning and Inspection
Maintenance plays a fundamental role in protecting the proper functioning of the Paint Protection Film (PPF). The dirt and other contaminants should be cleansed with a mild soap (preferably pH neutral) using a soft microfiber cloth that would not cause any scrapping on the film. Steel wool or other such abrasive material or aggressive chemicals should not be used as these are harmful to PPF in the long run.
Inspections should be done every now and then, every three months for instance, to check on wear and tear, failure to adhere, or tears. Films that seem to be peeling, or any scratches on the surface that might affect the film coverage viewing should be noted. Such neglect and inconveniencing experiences is what keeping the PPF intact and maintaining it is meant for so such is the case with the surface of the vehicle.
When to Consider PPF Replacement
Under certain circumstances, it might also become inevitable to substitute Paint Protection film (PPF). When the film starts becoming more and more discolored, yellowed, or faded, it is a clear indication that the level of protection offered by that film has reduced and it now has to be changed for the sake of performance. Further, any instances of severe cracking, lifting or peeling may also weaken the film and such areas should be considered for replacement as soon as possible. If the film has perished to such an extent that it no longer shields the paint and the paint work is exposed or has been damaged out, then it follows that the PPF should be replaced so as to guard against further damage to the surface of the automobile. Last, when the car is repainted or modified in design or bodywork and such changes affect the aesthetics of the vehicle, it may be prudent to assess and if need be, substitute the PPF so that it suits the protective and aesthetic needs of the automobile after refinishing.
Combining PPF with Ceramic Coating for Extra Protection
Using Paint Protection Film (PPF) together with ceramic polish makes it possible to fully defend automobile surfaces, improving corrosion resistance in addition to other advantages. PPF is a tough skin that fights physical obstacles like scratches, chips and insect splatter while ceramic coating exhibits good anti-wetting properties and UV blocking efficiency. This together forms what is referred to as a two in one coating, which protects the vehicle and makes it easier to clean since the surfaces do not attract dirt and grime. In addition, they can also be used to improve the clarity of the underlying paint on top of PPF while the life-span of PPF and other coatings are also improved. This type of strategy makes it possible for car owners to have an appealing and strong surface, which is very important for high-class motor vehicle investments.
Reference Sources
Frequently Asked Questions (FAQs)
Q: What is PPF and how come it is advisable to attempt to do the installation by oneself?
A: PPF or paint protection film is a clear external layer put on the surface of the car to prevent damage, pealing, scratches, or chips on the paint. A DIY installation can save more on costs than if you hire a professional installer. In addition, it creates room for a personalized approach to the application, and it is an enjoyable day activity for car lovers.
Q: How hard is it to put PPF on a Tesla Model 3?
A: Application of PPF on a Tesla Model 3 might be difficult due to the car folds and contours. But, the availibility of precut kits specifically made for the Tesla Model 3 helps individuals who would like to perform such DIY procedures. However, it is important to note that patience and meticulousness are also essential to the accomplishment of a professional job.
Q: Do I have to possess any specific tools or equipment to get the PPF installed?
A: The basic tools needed for self-completion of the PPF installation include squeegees, spray bottles with water and some soap, a heating gun, and a cutting tool. Most precut kits will have some of these tools, meaning that one does not have to struggle too much with the day.
Q: Is it advisable to cover the entire car with PPF, or should it only be fixed at certain places?
A: This will depend on your taste and how deep your pockets are. Some individuals go for protecting certain areas that are prone to impact such as the front bumper and the hood or the door handles while others go for a full front and even the whole car just for the sake of it.
Q: How much time do I need to apply PPF if I am going to do it myself?
A: The time necessary to perform PPF installation by oneself is subjective to an individual's know-how and how large the automobile is. To a beginner, it can take anywhere from a few hours to a full day. It is still essential to factor in ‘curing time’ so that an individual doesn’t rush to drive after having the film applied.
Q: Is it possible to apply PPF to a car that has already been ceramic coated?
A: Yes, PPF can be fitted onto a car that has a ceramic coating; however, the coating must be cured and the surface prepared properly to prevent poor bonding. Always refer to the manufacturer’s instructions for high-quality end results.
Q: If I do PPF installation myself, will the value of my car suffer?
A: A typical DIY PPF method can help preserve the condition of the coated paint which usually increases the resale value of a car. In the proper manner applied, PPF defends the car paint and hence the look of the vehicle is preserved for the next buyers.
Q: What are some of the errors one should be cautious of when doing DYI PPF?
A: Common errors include insufficient cleaning of the surface, over-stretching the film, and not using or applying enough of the solution to keep the film tacky. Avoid doing this by preparing the surface in whichever way possible and by following instructions carefully.
Q: What steps should I take with regard to my car's PPF wrap after installation?
A: After your PPF wrap is fitted, do not wash the car for at least 48 hours because the film has not adhered. Clean the surface with mild, soap-free polishes and lint-free cloths. Doing that will help to protect the paint from exposure to the elements.
